Secure POP/IMAP Connections and SMTP Authentication Setup
This document will describe how to configure Eudora 6.x, Netscape 7.x, Thunderbird 1.x and Microsoft Outlook 2003 to use secure POP/IMAP connections as well as SMTP authentication. Older versions of these e-mail clients may be configured similarly, but not exactly.
Eudora 6.x Secure Connection/SMTP Authentication Setup
The Eudora e-mail client is the most difficult of the four described mail clients to configure to use the secure POP/IMAP connection that the SIUC e-mail servers offer. Not only do you have to make configuration changes within the e-mail client itself, you also have to manually edit a configuration file which will force Eudora to interact correctly with the SSL (secure) connection to the e-mail servers.
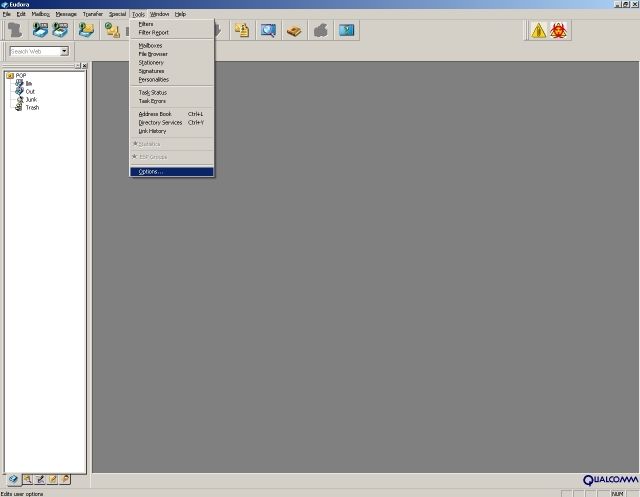
Open Eudora as if you were going to check your e-mail. Click on the "Tools" menu and select "Options".
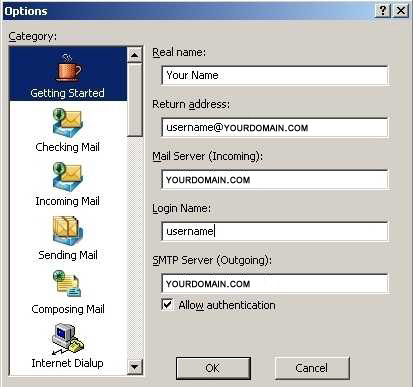
You will see the "Options" window. In the "Getting Started" section verify that your settings are correct. You should have your domain "yourdomain.com" as the incoming mail server and "yourdomain.com" selected as the outgoing (SMTP) server. Place a checkmark in the checkbox next to the "Allow authentication" box.
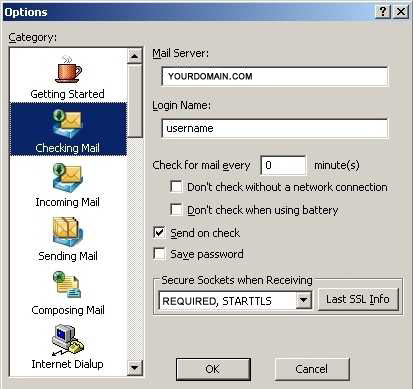
Click the "Checking Mail" icon in the left hand column to move onto the next step. Under "Secure Sockets when Receiving", click the drop down menu and select "Required, STARTTLS". If for some reason the secure connection is unavailable, you will be unable to receive or send e-mail.
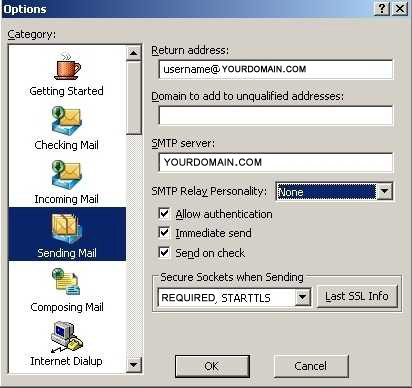
Click the "Sending Mail" icon in the left hand column to continue. Click the "Allow authentication" box (this will activate SMTP authentication), and under "Secure Sockets when Sending" select "Required, STARTTLS". Click the "OK" button.
You now have completed the configuration portion of the Eudora e-mail client. The next step is the most important, and the most difficult. If you do not complete this step, you will be unable to send and/or receive e-mail with your Eudora e-mail client.
You must locate a file on your PC called "eudora.ini". This is the configuration file that must be edited to allow Eudora to communicate correctly with the SSL connection on the e-mail servers. This file will be located in the directory where you installed Eudora.
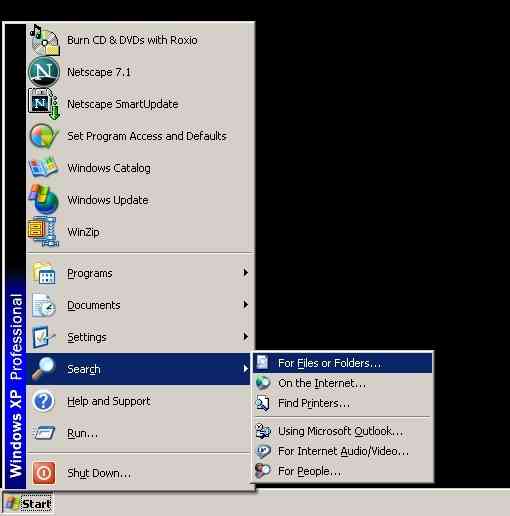
To locate this file, we recommend using the Windows search function. To use this function, do the following. Click the "Start" button and select "Search", then select the "For Files or Folders" option. See below.
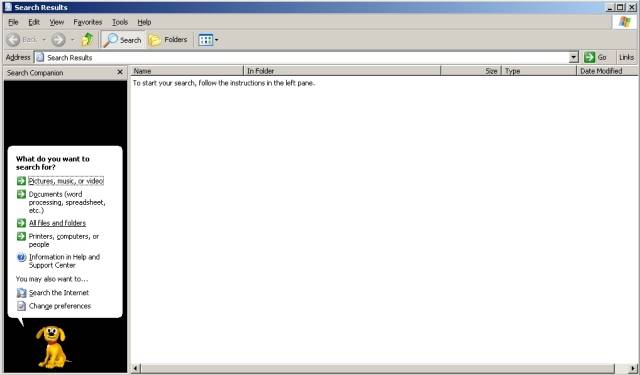
You will see a search screen appear. Click on "All files and folders" (the third green arrow down).
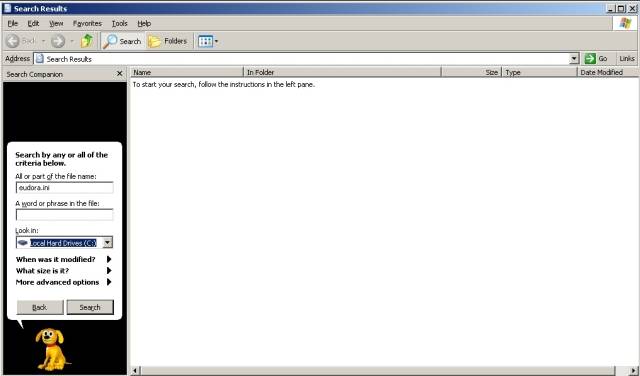
You will see the following screen. Be sure to type in "eudora.ini" in the first field. Leave the second field blank, and make sure you have "Local Hard Drive (C:)" in the third and final field. After you have done this, click the "Search" button.
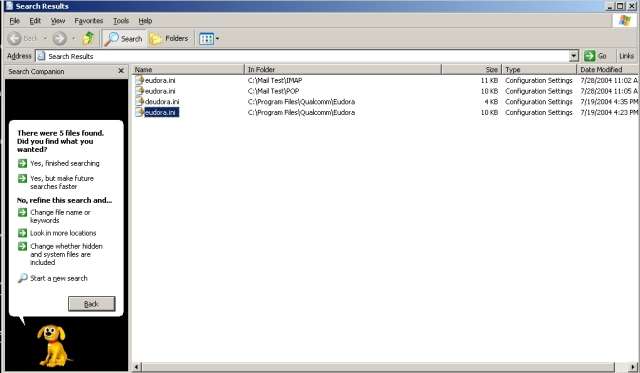
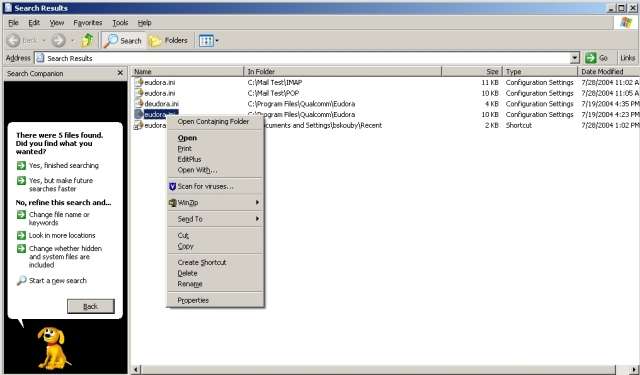
It is possible that the search function will return more than one location of the "eudora.ini" file. Pay attention to the location of the files. If you know what path you installed your Eudora in, select the file that corresponds to that path name. It is likely that your Eudora is installed in the default directory, so select the "eudora.ini" file that is located in C:\Program Files\Qualcomm\Eudora.
Once you have determined the location of the "eudora.ini" file, select this file and right click on it. You will see a menu similar to the one below appear. Select "Open" from this menu.
The "eudora.ini" file will open up in Notepad. You must scroll to the bottom of the [Settings] section and insert the necessary lines.
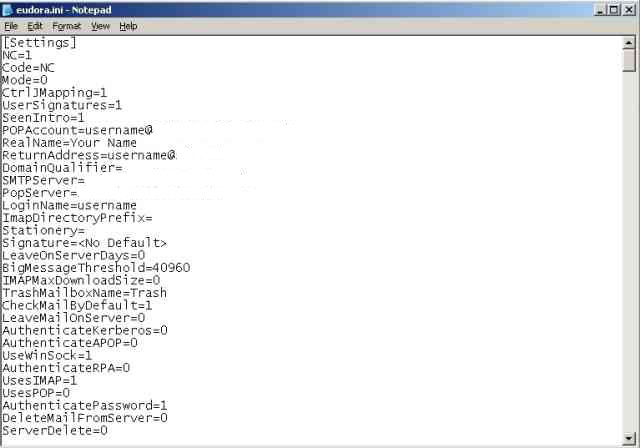
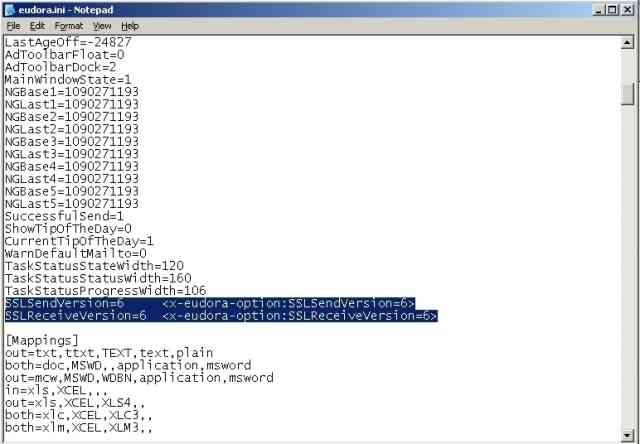
Scroll to the end of the [Settings] section (right above [Mappings]) and insert the following lines:
SSLSendVersion=6 <x-eudora-option:SSLSendVersion=6>
SSLReceiveVersion=6 <x-eudora-option:SSLReceiveVersion=6>
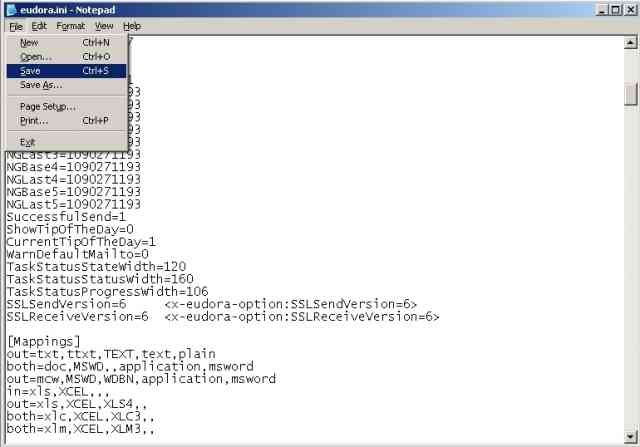
After you insert these lines, click "File" and then "Save".
You can now open your Eudora mail client and test the configuration changes. First, you need to check your mail to confirm that your newly configured Eudora can interface with the SSL connection on the mail server. If you are able to enter your password and successfully download/access your mailbox, your configuration of the incoming mail server was successful.
Next, you need to attempt to send an e-mail message. You will be prompted for your password again in order to authenticate yourself on saluki-mailhub.siu.edu (outgoing mail server).
If the configuration changes you made are not correct, you will be unable to send and/or receive messages and will probably receive a warning message that says that the e-mail server does not support SSL connections. If this happens, start at the beginning of this document and go through the process again. If Eudora still cannot send and/or receive mail, go back to the receiving and sending sections of this document and select "Never" under the "Secure Socket when Receiving" and "Secure Socket when Sending" area. This will turn the secure connection and SMTP authentication off, but you should be able to send and receive mail once again.
Netscape 7.x Secure Connection/SMTP Authentication Setup
Configuring Netscape 7.x to use the secure POP/IMAP connection that the SIUC e-mail servers offer is a relatively easy process. You first must open Netscape Messenger as you would as if checking your e-mail.
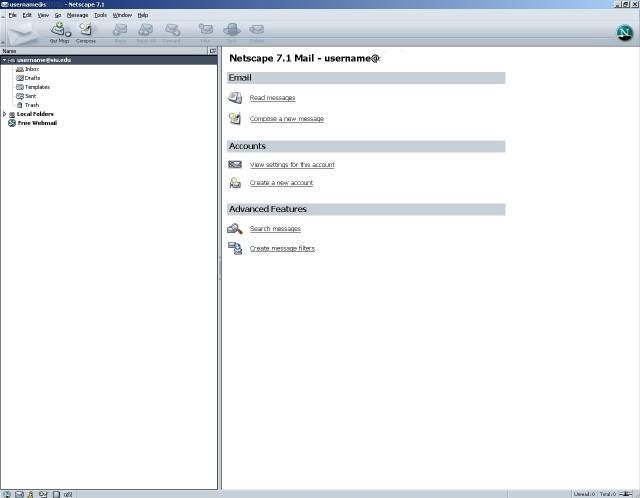
Click the e-mail address you wish to configure (on the left hand side), and you will see a screen similar to the one below. Click the "View settings for this account" link in the middle of the page on the right hand side.
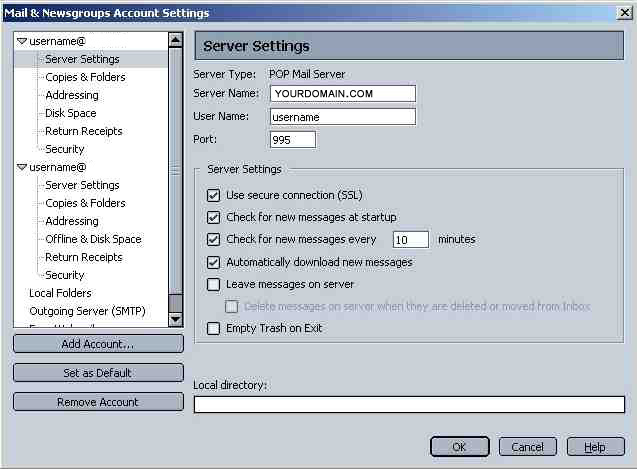
You will see a pop-up menu similar to the one below. Click "Server Settings" in the field on the left hand side under the e-mail account you wish to configure. On the right hand side, click the check box next to "Use secure connection (SSL)". Verify that the Server Name is correct yourdomain.com and that your Network ID appears and is correct. The "Port:" number will automatically be changed for you. If you are a POP user, the port number will be 995, if you are an IMAP user, the port number will be 993.
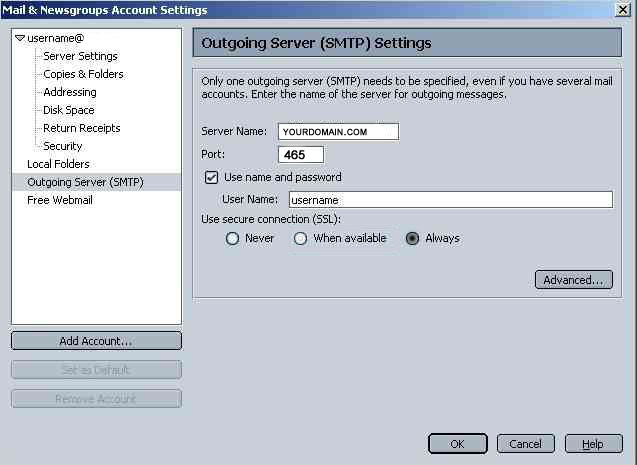
Click the "Outgoing Server (SMTP)" link in the left hand field. Verify that the Server Name is correct yourdomain.com, change the server name if it is not correct. Enter 465 in the Port. Click the checkbox next to "Use name and password" and fill in your Network ID (the first part of your e-mail address) in the appropriate field. Click the " Always" radio button under "Use secure connection (SSL):". This process will activate both secure connections on the outgoing mail server as well as SMTP authentication. Click the "OK" button.
Close and reopen Netscape. Verify that these setting work correctly by first attempting to check your mail to confirm that the configuration changes for the incoming e-mail server are correct. If you are able to check your mail, test the outgoing e-mail server by sending an e-mail message to someone (yourself is fine). You will be prompted to enter your password to authenticate yourself on the outgoing e-mail server yourdomain.com.
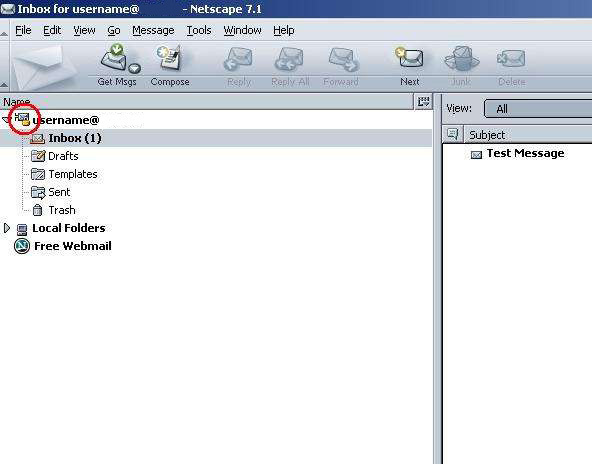
You should also see a small yellow lock icon appear next to your e-mail address (see below in red circle) in Netscape Messenger. This shows you that Messenger is using a secure connection.
Thunderbird 1.x Secure Connection/SMTP Authentication Setup
Configuring Thunderbird 1.x to use the secure POP/IMAP connection that the SIUC e-mail servers offer is a relatively easy process. You first must open Thunderbird as you would as if checking your e-mail.
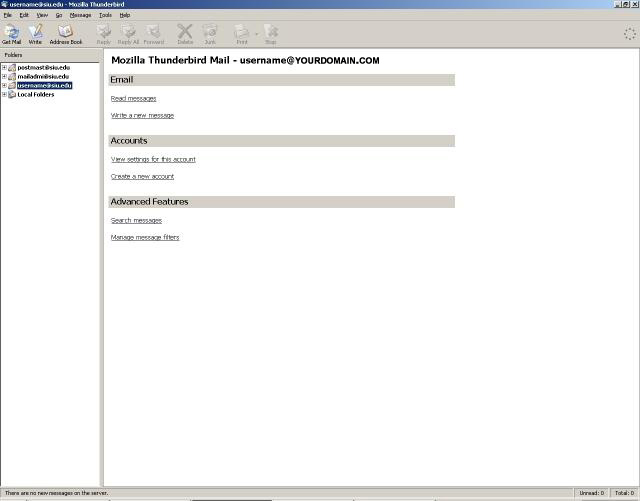
Next, click the e-mail address (most users will only have one) you wish to configure (on the left hand side), and you will see a screen similar to the one below. Click the "View settings for this account" link in the middle of the page on the right hand side.
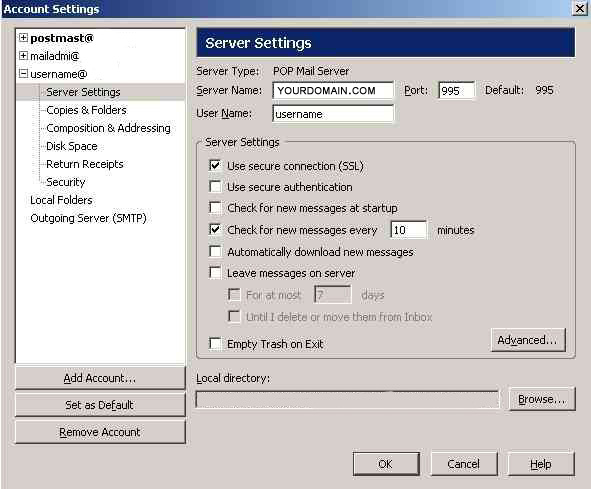
You will see a pop-up menu similar to the one below. Click "Server Settings" in the field on the left hand side under the e-mail account you wish to configure. On the right hand side, click the check box next to "Use secure connection (SSL)". Verify that the Server Name is correct (yourdomain.com) and that your Network ID appears and is correct. The "Port:" number will automatically be changed for you. If you are a POP user, the port number will be 995, if you are an IMAP user, the port number will be 993.
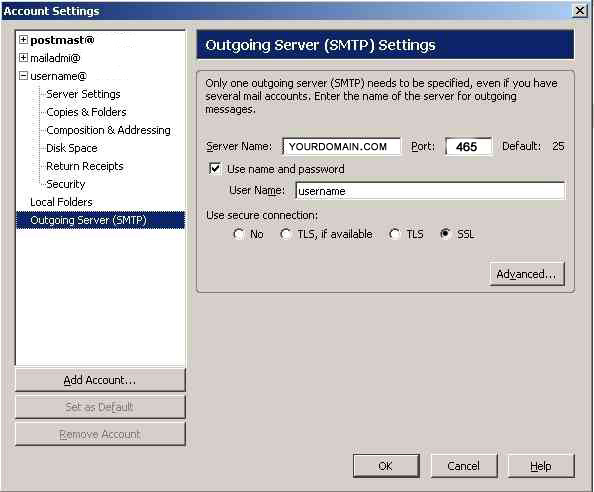
Click the "Outgoing Server (SMTP)" link in the left hand field. Verify that the Server Name is correct yourdomain.com, change the server name if it is not correct. Click the checkbox next to "Use name and password" and fill in your Network ID (the first part of your e-mail address) in the appropriate field. Click the "Required TLS" radio button under "Use secure connection (SSL):". This process will activate both secure connections on the outgoing mail server as well as SMTP authentication. Click the "OK" button.
Close and reopen Thunderbird. Verify that these setting work correctly by first attempting to check your mail. If you are able to check your mail, test the outgoing e-mail server by sending an e-mail message to someone (yourself is fine).You will be prompted to enter your password to authenticate yourself on the outoing e-mail server yourdomain.com. If your configuration changes were successful, you will be able to send and receive e-mail.
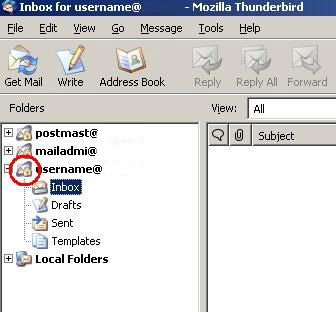
You should also see a small yellow lock icon appear next to your e-mail address (see below in red circle) in Thunderbird. This shows you that Thunderbird is using a secure connection.
Microsoft Outlook 2003 Secure Connection/SMTP Authentication Setup
Configuring Microsoft Outlook 2003 to use the secure POP/IMAP connection that the SIUC e-mail servers offer is a relatively simple process. There are several steps, but the steps themselves are not complicated.
This process is documented using Microsoft Outlook 2003. Earlier versions of Microsoft Outlook will be configured in a similar, but not in an exact way.
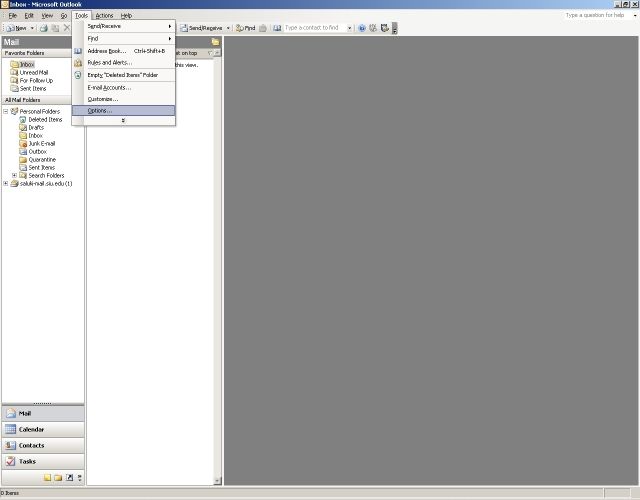
To configure Outlook 2003 for secure connections and SMTP authentication, you first must open Outlook as if you were going to check your e-mail. Once you have Outlook loaded, click the "Options" selection under the "Tools" menu.
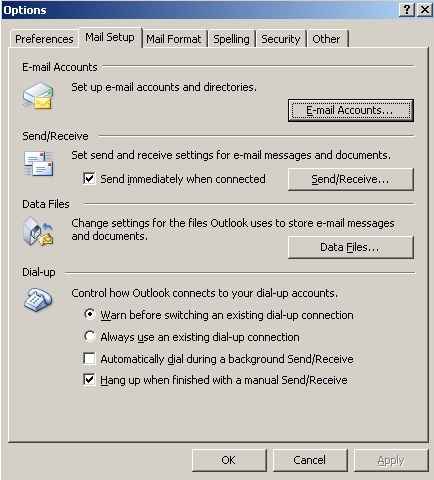
The "Options" menu will open, and you will see the following. First, click the "Mail Setup" tab. Then click the "E-mail Accounts" button.
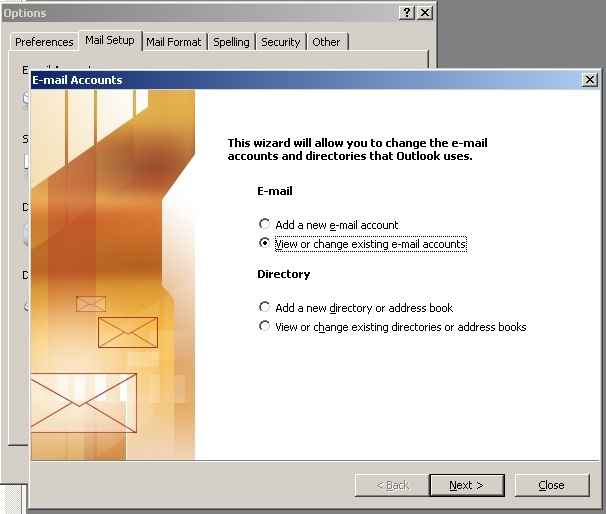
When the "E-mail Accounts" window appears, select "View or change existing e-mail accounts" and click the "Next" button.
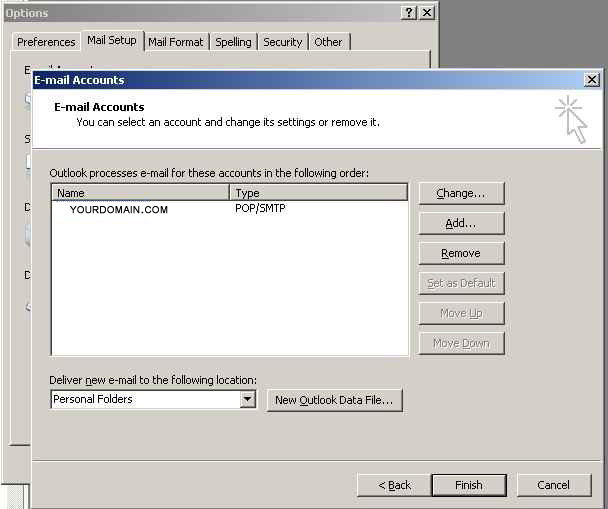
After clicking "Next" you will see the following screen. Select the e-mail account that you wish to edit, and click the "Change" button. The majority of users will only have one e-mail account list here, but if you use Outlook 2003 to access multiple e-mail accounts, be sure you are configuring the correct account.
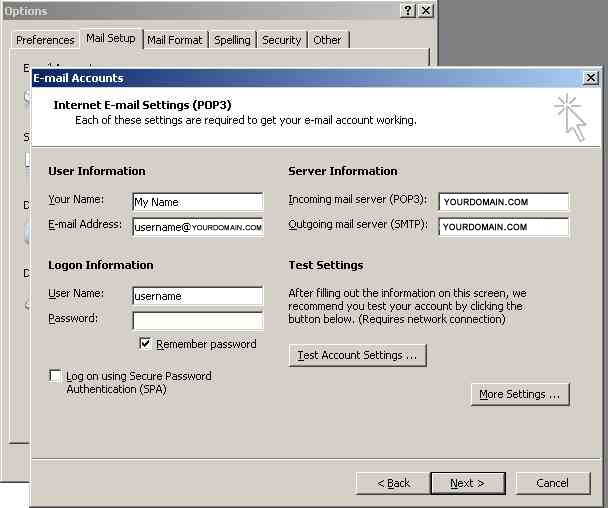
After clicking the "Change" button, you will see the following screen. Verify that the information on this screen is correct. Click the "More Settings" button to continue.
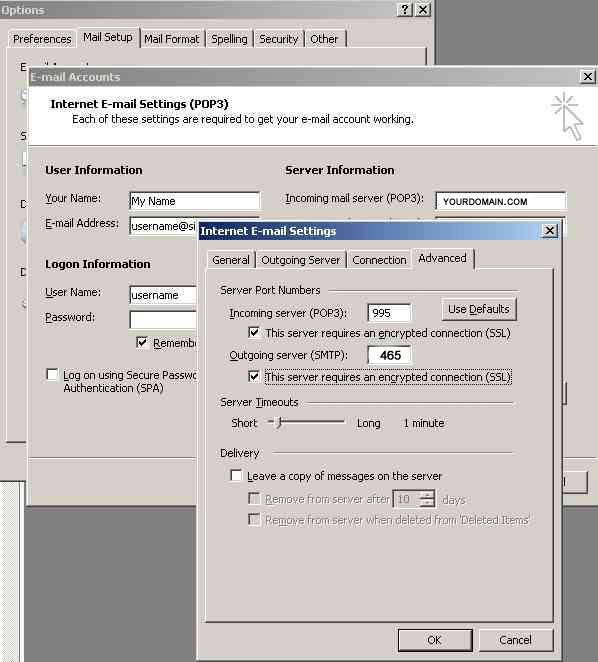
You will see a window titled "Internet E-mail Settings" open. Click the "Advanced" tab. Place a checkmark in check boxes under "Incoming server (POP3)" (POP users will see port 995, IMAP users will see port 993) and "Outgoing server (SMTP)".
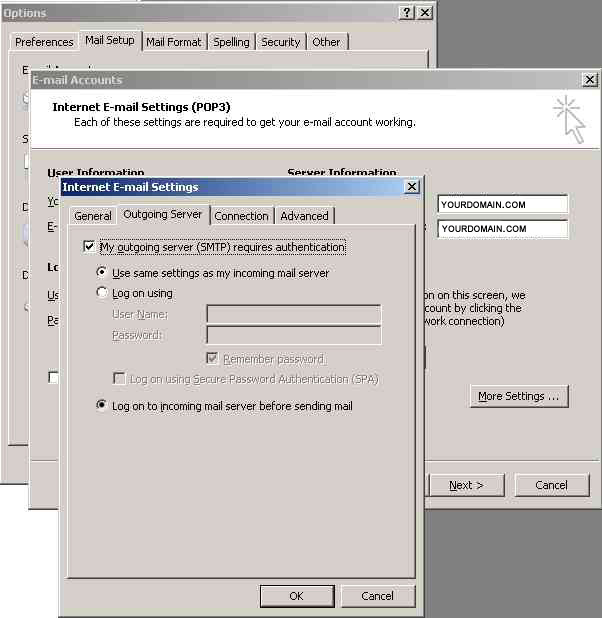
To activate SMTP authentication, click the "Outgoing Server" tab. Place a check in the box next to "My outgoing server (SMTP)...", and select "Use same settings as my incoming mail server ". Click the "OK" button.
Click the "Next" button on the "E-mail Accounts" screen, and click the "Finish" button on the "E-mail Accounts" screen. Finally, click the "OK" button on the "Options" screen and this will return you to the main Outlook interface.
Close and reopen Microsoft Outlook 2003. Verify that your configuration settings are correct by clicking "Send/Receive" to check your e-mail. If you are able to connect and receive e-mail, your configuration settings for the incoming e-mail server are correct.
To check the outgoing e-mail server configuration, compose a test e-mail (to yourself is fine) and attempt to send it. You will be prompted to enter your password in order to authenticate yourself on the outgoing e-mail server yourdomain.com. If you are able to send e-mail, your configuration is correct.